Thursday 25 September 2014

It's a Steal of a Deal

This summer, ten teachers from Teachers Pay Teachers joined together to compile an EXCLUSIVE bundle of math resources for 3rd through 9th grade Math. The total value of all of these resources is over $125, and you can grab it for only $25! That an 80% savings!


The CD bundle contains a variety of resources, covering an array of concepts from some of your favourite TpT authors!

What did I add to the mix?

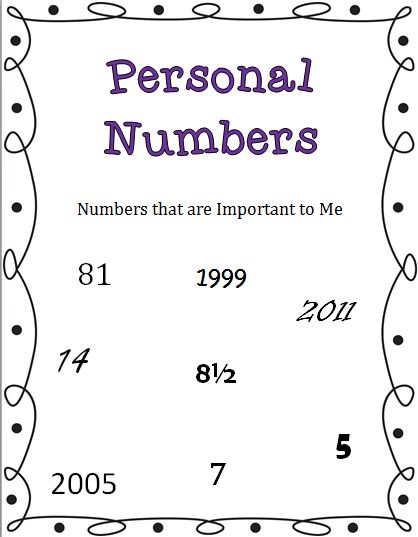
My top seller - Writing in Math Class?


"Isn't journaling for English class?"
Who would have thought that you can journal in math class too!
Within this resource you will find a collection of journal starters to help your students start thinking beyond the numbers.
You will also find some useful prompts to help you use journaling as a very insightful form of assessment.


AND

One of my newer resources - Fraction Dice


Within this resource you will find a collection of activities focused on strengthening fraction sense by working with them in a fun and interactive way. These activities can be used at multiple grade levels, as you decide the difficulty based on the fractions you have the students use. More than 15 activities and printables are included in this pack, along with directions for your DIY dice.


Want to know more about what you will be getting on this exclusive CD bundle? 

Make sure to visit each participating seller's blog to find out exactly what you will be receiving!

There is a very limited quantity - once we're sold out, they're gone forever!

Don't miss out! Grab your copy at 4mulaFun.com.


Saturday 20 September 2014

Bright Idea - Dealing with Late Assignments

I am excited to be teaming up with an amazing group of teacher bloggers, once again, to bring you the "Bright Ideas Link Up". This link up was created to bring you practical classroom ideas from a variety of teachers, from different grades and subject areas. I hope you find some great ideas that you can easily implement in your own classroom. Enjoy!


Do you have students who hand in work late?

Do you have a hard time always keeping track of who handed in what and when?

I don't know about you, but I will fully admit that I do not always get every assignment marked the same day that students hand it in. When this is the case, I may not necessarily remember that Jack and Jill handed in their assignments 2 days late, when they are just adding theirs to the top of the pile in the INBOX.

There is nothing worse than trying to get your class settled and working, while those few students scramble to hand in their assignments late. I don't have time to lose the attention of my whole class, while I make note of who is handing in their assignments past the due date.

How can I quickly and efficiently keep track of late assignments without taking time away from my scheduled classes?


The idea - Use a date stamp to keep track of when students hand in an assignment


I can't remember where I got the idea for this simple, time-saving tip, so I can't take the credit for it, but its too good not to share.

Anytime students have an assignment to hand in, quickly date stamp it before it goes into the INBOX.
Pick up a date stamp from any office supply store.
You know those old-school ones they use to use to sign books out from the library??

If you are trusting, you can make your students responsible for stamping their own assignments. Keep the stamp by the INBOX and hold your students accountable for date stamping their work.

OR

Have the stamp in hand as your students come into your class, quickly date stamp assignments as they hand them in to you.


So, next time you don't get to that pile of marking for a few days, you will be well aware of who handed in their assignments late and just how late they handed them in.

Now...how you deal with assessing those late assignments is a whole other can of worms, which I will let you decide on your own. :)


If you enjoyed this bright idea, please consider joining me on Facebook for more great ideas!

For even more bright ideas, please browse through the link-up below, and choose a topic/grade level that interests you. Thanks for visiting!


Sunday 7 September 2014

Math Scrapbooking - Getting Started


Over the last few months I have had a few inquiries about how I use math scrapbooks in my room. So with a new school year upon us, I figured I would start by telling you how I get them started.

I have been using math scrapbooks as an active engagement tool in my classroom since I started teaching ten years ago. Over time my scrapbooks have definitely evolved and become something I most look forward to starting with my students at the beginning of the year.

I know interactive notebooks are super popular lately, and there are so many amazing resources out there, but I like to think my scrapbooks are a little different. I think of them as an interactive math portfolio, where students demonstrate their learning in a hands-on and unique way. The scrapbook certainly doesn't act as my whole math program, but simply a place for students to "record" their understanding and growth.

I hope to share many ideas with your over the course of this year, and hopefully convince you to do a little math scrapbooking in your own classroom.

So let's get started...

What you need to make a scrapbook in your class:

A notebook (any kind will do), a student, and some ideas.


In the younger grades (4 - 6) I have used the larger 11 x 14 scrapbooks. I find that the blank pages allow for more creativity. 


In the  higher grades (7 and 8), I like to use a traditional 80 page lined notebook.


I make sure that my first activity of the year is something that is personal, engaging and will ease students back into math class. Here is a past blog post about my "Personal Numbers" activity, which becomes the first page in my students' scrapbooks. It makes a great get-to-know-you activity for those first few days back.


During the first few days of school, any time there is some extra time at the end of class, I allow the students to take the time to decorate the covers of their scrapbooks. The only criteria is that they have their name, and "Math Scrapbook" somewhere on the cover, otherwise they can decorate as they like.


You really don't need anything fancy for these scrapbooks, just the basics - coloured paper, glue, scissors. markers, pencil crayons, old magazines, etc.


Being a scrapbooker myself, I like to bring in some stamps, punches, etc, but they are not a necessity.

This year a colleague of mine, decided to have the students use their "Personal Numbers" activity as the cover page. Might have to use that idea in the future!


Stay tuned for more scrapbooking ideas!


Friday 5 September 2014

Math is Real Life - September 2014 Edition

 I am happy to once again join up with the fabulous linky hosted by Miss Math Dork, 4mulafun, The Teacher Studio, and Teaching to Inspire in 5th! 


School has officially started and fall is in the air. Though I am sad to see summer end, there is just something about fall...


What's not to love??

One of my favourite things about the end of August is harvesting the garden. As some of you know from an earlier post, my dream garden did not come to fruition this year, but I found the next best thing. A u-pick garden (amazing idea) just 5 minutes from my house.

When we went to check it out we weren't sure what we might get, but once we saw the variety and multitude of fresh veggies at our finger tips, it was hard to stop picking. Our biggest haul was 25 pounds of pickling cukes at $1.10/lb (much cheaper than our local farmer's market).

Now, I love pickles, but I have never attempted to make them before. With 25 lbs of cukes sitting on my counter I didn't have much choice but..........to call my mom.
As a child I remember going into our basement pantry and seeing jars upon jars of pickles, tomatoes, jams, jellies and more, so I knew I was dealing with a seasoned pro. Especially when she showed up with recipe from a special edition of Better Homes and Gardens from 1977!!


First we started by squeezing the cukes into the jars along with some garlic, dill and pickling spice.


Next we needed the pickling solution. We brought 3 quarts water, 1 quart vinegar, 3/4 cup salt, and 3/4 cup sugar to a boil. Once it was up to temperature, we then poured the solution into the jars up to the rim and put on the lids.

Canning can be a tricky business, as you plan to store these items for a fairly long period of time without any type of refrigeration. It needs to be done right, so that nothing spoils. Spoiling would lead to wasted food or sickness. Technically if your solution is hot enough, the jars should seal within the next few hours. However, after years of experience, my mom swears by placing the jars in a 350 degree oven for 10 minutes, just to be on the safe side.


Voila - we have pickles! Well technically they need about 2 weeks to fully pickle. We've already sampled them, as my husband isn't the patient type. They were delicious! Nothing compare to home-made!

We even went on to make a few jars of bread & butter pickles using the larger cukes that we picked. YUMMMMM!

Hopefully we have enough to last through the winter, but at the rate my husband and son are eating them, we may go through these fast!


Now I wonder how much money we saved by making them on our own vs. buying them at the store???

'Til next month,